
Figure 1.0: Screenshot of MySQL Utility.
Introduction
This article covers how to talk to MySQL database and extract the schema from it.
Background
As many of you know, MySQL is an open source database. It is free for non-commercial purposes. This article would be helpful for anybody doing development in MySQL and C#. What is the motivation behind this utility? Well, an application could crash in the middle of database activities. Often, these databases may not reside on the same site as your development/testing machine. We need a utility that would help us get a snapshot of the database at client site. If you have an utility that would capture the state of the client database, then, you can load it in your testing machine. The idea is to reproduce the situation your client faced. That way you can address any undiscovered issues.
Functionality Supported
- Saving Schema as Text
- Viewing Schema
- Viewing Entire Database
Required Tools
- ODBC.NET Data Provider from Microsoft
- MySQL Database
- MySQL ODBC Connector
Using the code
First, add a reference to Microsoft ODBC. Then use the using microsoft.odbc statement to tell it that you want to you MS ODBC. In short, OdbcConnection will be used to open connection, OdbcCommand to execute queries, and OdbcDataReader to read the resulting row set. The code shown below documents each step. You will notice, it runs the MySQL specific command SHOW TABLES to get the list of tables. Then it runs another query based on that particular table, SHOW COLUMNS IN CURRENT_TABLE. This is all the code does.
The Code
 Collapse /*/////////////////////////////////////////////////////////////////////////
//
@@ Function:
@f ::PrepareSchema
//
@@ Description:
@d when this is called the widget is updated and everything
// about this database and tables are displayed
//
@@ Type:
@t public
//
@@ Arguments:
// none.
@@ Returns:
@r void
//
@@ Preconditions:
@c Provided that the GUI is running and DB Connection is made.
//
@@ Postconditions:
@o DB schema displayed
//
@@ References:
@e Query MySql with C#.
//
/////////////////////////////////////////////////////////////////////////*/
public void PrepareSchema()
{
// create the connection object by setting the DSN
OdbcConnection ocConnection = new OdbcConnection("DSN="+ strDSN);
// second connection is created so we could make
// queries while executing one
OdbcConnection ocConnection2 = new OdbcConnection("DSN="+ strDSN);
// this will open up both connections
ocConnection.Open();
ocConnection2.Open();
// declare the commands for each table and column
OdbcCommand ocTableCommand;
OdbcCommand ocColumnCommand;
// create a command object. this will execute SHOW TABLES
// query. In mysql, it shows all of the tables contained in
// the database in use.
ocTableCommand = new OdbcCommand("SHOW TABLES", ocConnection);
// declare reader objects for tables and columns
OdbcDataReader odrTableReader;
OdbcDataReader odrColumnReader;
// queries that return result set are executed by ExecuteReader()
// If you are to run queries like insert, update, delete then
// you would invoke them by using ExecuteNonQuery()
odrTableReader = ocTableCommand.ExecuteReader();
// place create db statement in rich text box
rchtxtSchema.Text += "CREATE DATABASE ";
rchtxtSchema.Text += ocConnection.Database;
rchtxtSchema.Text += ";\r\n\r\n";
rchtxtSchema.Text += "USE DATABASE ";
rchtxtSchema.Text += ocConnection.Database;
rchtxtSchema.Text += ";\r\n\r\n";
string strTable = "";
string strColumnName = "";
string strColumnType = "";
string strColumnNull = "";
string strColumnPKey = "";
string strColumnDflt = "";
string strColumnExtr = "";
// reader the set of tables
while(odrTableReader.Read())
{
// here we are expecting rows with only 1 column
// containing the table name. that's why explcity
// call GetString() at 0th index
strTable = odrTableReader.GetString(0);
rchtxtSchema.Text += "CREATE TABLE ";
rchtxtSchema.Text += strTable;
rchtxtSchema.Text += "\r\n(\r\n";
// build up the command for each table
ocColumnCommand = new OdbcCommand("SHOW COLUMNS IN " +
strTable, ocConnection2);
// run the query
odrColumnReader = ocColumnCommand.ExecuteReader();
// reading the set of columsn
while(odrColumnReader.Read())
{
// This query returns the name of column, Type,
// wherther it's Null, whether it's primary Key,
// the default value, and extra info such as
// whether it's autoincrement or not
strColumnName = odrColumnReader.GetString(0);
strColumnType = odrColumnReader.GetString(1);
strColumnNull = odrColumnReader.GetString(2);
strColumnPKey = odrColumnReader.GetString(3);
//strColumnDflt = odrColumnReader.GetString(4);
strColumnExtr = odrColumnReader.GetString(5);
if (!strColumnNull.Equals("YES"))
strColumnNull = " NOT NULL ";
else
strColumnNull = "";
if (strColumnPKey.Equals("PRI"))
strColumnPKey = " PRIMARY KEY ";
//this.rchtxtSchema.Text += "\n";
rchtxtSchema.Text += " ";
rchtxtSchema.Text += strColumnName;
rchtxtSchema.Text += " ";
rchtxtSchema.Text += strColumnType;
rchtxtSchema.Text += strColumnPKey;
rchtxtSchema.Text += strColumnNull;
rchtxtSchema.Text += ",";
rchtxtSchema.Text += "\r\n";
}
rchtxtSchema.Text = this.rchtxtSchema.Text.Substring(0,
this.rchtxtSchema.Text.Length-3);
rchtxtSchema.Text += "\r\n);\r\n\r\n";
// free up the reader object
odrColumnReader.Close();
}
// close the reader
odrTableReader.Close();
// disconnect
ocConnection.Close();
ocConnection2.Close();
}
Points of Interest
Initially, I kept going back and forth from ODBC, ADODB and OLEDB to implement this. According to MySQL, it is not safe to use OLEDB. There was no mention of how to utilize OLEDB to perform simple database tasks. At the end, it was decided doing this would be very simple in ODBC. You have probably noticed that I used built-in commands (i.e. show tables) that the specific DB provider uses. I am definitely open to any suggestions or working examples of standards that work with MySQL.
HOW-TO use this Demo
Saving Schema
First, click on Select the Target Database. This should produce the dialog box showing the list of system as well as user DSNs.
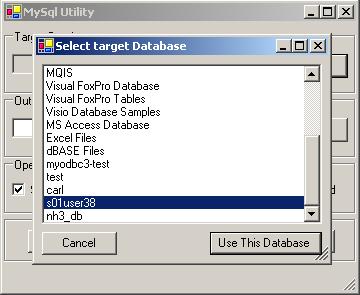
Figure 2.0 - Depicts the DSN dialog form.
Now, click on Save Schema File As and select where you wish to save the file.
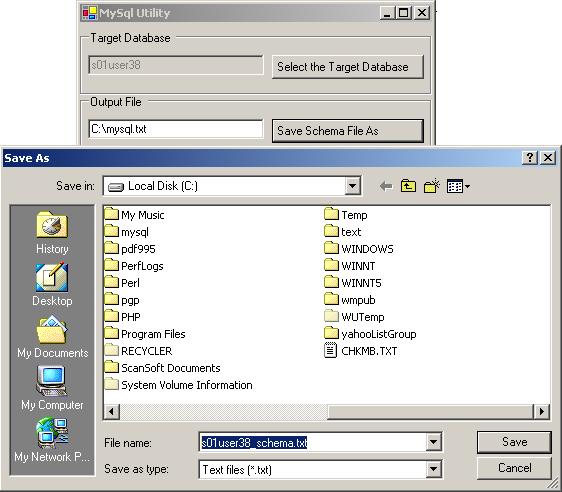
Figure 3.0 - Depicts the File Save dialog.
Next, make sure Save Schema is checked. Then click on Run.
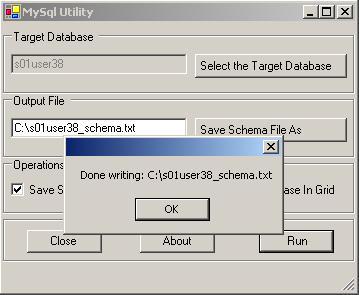
Figure 4.0 - Depicts the status of operation. In this example, the program successfully wrote C:\s01user38_schema.txt.
Viewing Schema
First, uncheck Save Schema and then check View Schema. It should produce the output as depicted in figure 5.0
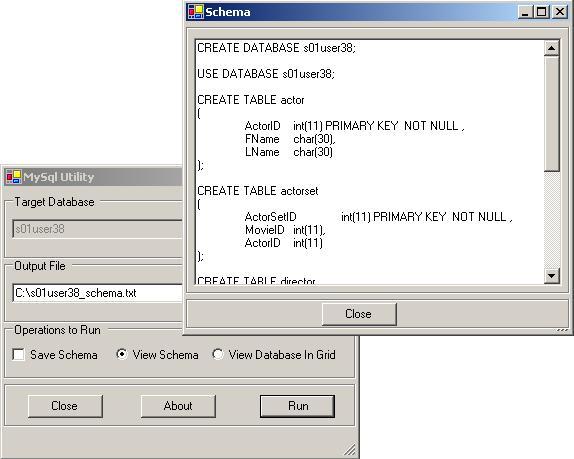
Figure 5.0 - Depicts the schema of s01user38.
Viewing Database
Now, click on View Database in Grid and press Run.
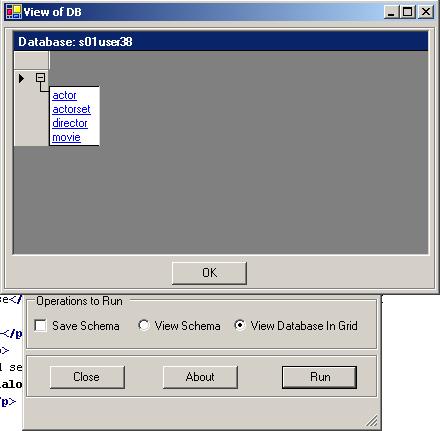
Figure 6.0 - Depicts the result of the query. It will show + initially. You have to click on it to expand all. Then it will show the tables as shown in this graphic. Then click on each blue link to see the rowset they contain.
